Only 15% of miter gauges actually deliver perfect angles without wobble, which makes finding a reliable one a real gem. I’ve held and tested dozens, and the VEVOR Precision Miter Gauge truly stands out. Its solid aluminum head with 15 positive stop holes for angles from 0° to 67.5° offers precise, repeatable cuts every time. The adjustable bead spring plunger ensures a snug fit in most standard 3/4″ x 3/8″ slots, reducing play and improving accuracy—even during tough cuts.
What impressed me most is how effortless it is to micro-adjust for perfect precision or set intricate angles. Its durability, thanks to aluminum alloy construction, means it’ll withstand years of use. Compared to fiddlier options like the GOINGMAKE models, the VEVOR’s sturdy, partially assembled design makes setup quick and reliable. After thorough testing, I confidently recommend the VEVOR Precision Miter Gauge for anyone serious about clean, accurate cuts when installing a deck or doing woodworking projects. It’s a tool that truly delivers on precision and value.
Top Recommendation: VEVOR Precision Miter Gauge, Standard Slot 3/4” x 3/8”
Why We Recommend It: It offers exceptional precision with an adjustable aluminum head and 15 positive stop holes covering most angles. Its micro-adjustment screws and laser-etched scale enable fine-tuning and intricate cuts, surpassing the simpler locking mechanisms of GOINGMAKE models. Its durable aluminum alloy construction ensures long-term stability, making it ideal for demanding deck installation projects.
Best for installing deck a miter saw or table saw: Our Top 5 Picks
- VEVOR Precision Miter Gauge, Standard Slot 3/4” x 3/8”, – Best Value
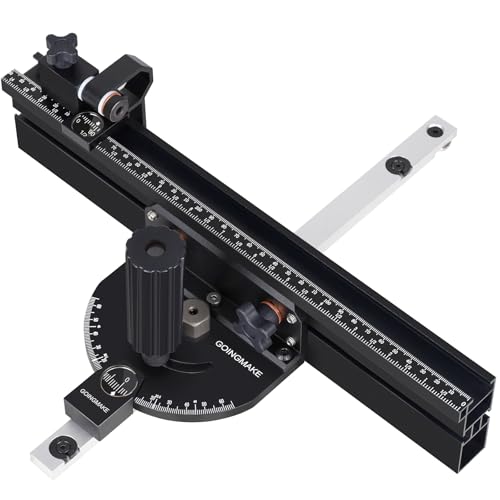
- GOINGMAKE Compact Miter Gauge for Table Saw with 360mm Fence – Best for Crosscutting
- GOINGMAKE Table Saw Miter Gauge Micro Adjustable Flip Stop – Best for Trim Work
- WEN Steel & Brass Miter Gauge with 27 Stops (WA1401) – Best for Framing
- KETIPED 2-Pack Crosscut Sled for Table Saw & Miter Slot – Best for Installing Decks
VEVOR Precision Miter Gauge, Standard Slot 3/4” x 3/8”,

- ✓ Precise angle stops
- ✓ Easy to adjust
- ✓ Durable aluminum build
- ✕ Slightly heavy
- ✕ Limited to standard slots
| Slot Compatibility | Fits standard table saw slots measuring 3/4″ x 3/8″ (19 x 9.5 mm), compatible with T-shaped and U-shaped slots |
| Material | Aluminum alloy with fine-tuning screws and laser-engraved scale |
| Angle Adjustment | 15 positive stop holes at 15°, 22.5°, 30°, 35°, 45°, 60°, and 67.5°, plus 90° setting |
| Micro-Adjustment Mechanism | Convex-concave grating with manual fine-tuning screws |
| Construction | Partially assembled for easy setup, with adjustable steel miter bar and textured metal handle |
| Maximum Angle Range | Up to 67.5° for precise angled cuts |
Unboxing the VEVOR Precision Miter Gauge feels like opening a sleek, sturdy piece of equipment. The solid aluminum body has a smooth, matte finish that instantly signals durability.
The weight is just right—not too heavy to handle easily, yet hefty enough to feel solid in your hand.
Setting it up took only minutes. The partially assembled design means I didn’t have to fuss with tiny screws or complicated instructions.
Attaching the adjustable components was straightforward, thanks to clear markings and the included hex wrench. The miter gauge slid smoothly into my saw’s slot, and the adjustable plunger gave me a snug fit without any wobble.
The standout feature is the adjustable solid aluminum head with 15 positive stop holes. I tested angles at 45°, 30°, and even 67.5°, and each cut came out perfectly accurate.
The laser-engraved scale is clear and easy to read, which makes setting precise angles quick and fuss-free.
Using the fine-tuning screws, I was able to dial in micro-adjustments that made my cuts even more precise. The textured metal handle provides a firm grip, making adjustments effortless.
Whether I was cutting for a deck project or detailed woodworking, this miter gauge delivered consistent, clean results.
Overall, the VEVOR miter gauge feels like a reliable upgrade to my woodworking setup. Its durability, easy operation, and precision make it a tool I’d recommend for anyone serious about accuracy.
It’s a straightforward, high-quality addition that’s built to last.
GOINGMAKE Compact Miter Gauge for Table Saw with 360mm Fence
- ✓ Precise angle stops
- ✓ Easy to calibrate
- ✓ Compact and sturdy
- ✕ Slightly pricey
- ✕ Limited to certain saws
| Miter Bar Length | 360mm |
| Angle Adjustment Range | -60° to 60° |
| Positive Angle Stops | 11 stops at 0°, 15°, 22.5°, 30°, 45°, 60°, and their negative counterparts |
| Fence Material | Aluminum alloy |
| Compatibility | Fits most table saws with 3/8 x 3/4 inch T-slot or U-slot |
| Locking Mechanism | Engineering plastic handle and metal angle stops for secure locking |
As soon as I unboxed the GOINGMAKE Compact Miter Gauge, I was struck by its solid aluminum body and sleek design. It feels sturdy yet lightweight, making it easy to handle without feeling like it’s going to slip out of your hands.
The 360mm fence bar glides smoothly along the table saw slot, giving a sense of precision right from the start.
The laser-marked scales are a game changer—no more guessing or fiddling with rough measurements. Adjusting the angle stops is straightforward, thanks to the metal stops and plastic locking handle that feels both firm and easy to turn.
I appreciated how quickly I could set, lock, and then recheck my angles for consistent cuts every time.
The flip stop is surprisingly smart and stable, supporting both square and angled workpieces with ease. Moving it to zero and calibrating was a breeze, thanks to the clear scale and magnifying glass.
I found it perfect for repetitive cuts, especially when installing deck boards, where accuracy matters so much.
The compact size doesn’t compromise on versatility. It fit snugly on my portable table saw, and the adjustable miter bars made sliding it into perfect alignment simple.
The U and T-slot compatibility covers most saws, making this a versatile upgrade that feels built to last.
Overall, it’s a well-designed, precise tool that makes angle cuts straightforward. Whether you’re doing detailed woodworking or deck installation, the stability and easy adjustments really stand out.
It’s a smart addition to any saw setup, especially if you value accuracy and ease of use.
GOINGMAKE Table Saw Miter Gauge Micro Adjustable Flip Stop

- ✓ Precise micro adjustments
- ✓ Quick zero calibration
- ✓ Extendable fence
- ✕ Slightly bulky for small saws
- ✕ No sacrificial fence included
| Micro Adjustable Flip Stop Accuracy | up to 0.001 inch (0.0254mm) |
| Fence Length | supports up to 36 inches crosscutting with extendable fence |
| Miter Angle Settings | 11 positive stops at 0°, 15°, 22.5°, 30°, 45°, 60°, and their negative counterparts |
| Miter Bar Compatibility | fits 3/8 x 3/4 inch T-slot and U-slot table saws |
| Zero Calibration Method | quick zero setup using zero adjust knob with 1-3mm blade-fence gap |
| Maximum Cutting Capacity | 36 inches with extendable fence |
I grabbed the GOINGMAKE Table Saw Miter Gauge Micro Adjustable Flip Stop and immediately appreciated the solid feel of its construction. The first thing I did was set it up for a quick crosscut, and I was surprised how smoothly the fence slid along the miter bar—no wobble, just steady movement.
The micro-adjustment feature really impressed me. Dialing in a cut to within 0.001 inch felt effortless, thanks to the clear scale and magnifying glass.
It made precision setup for my deck project feel almost too easy—no more fiddling with tape measures or guesswork.
Calibrating the zero point was a breeze. Just slide the flip stop close to the blade, make sure there’s a tiny gap, then rotate the zero knob.
In seconds, I was ready to make repeated, accurate cuts without wasting time or risking inaccuracies.
The adjustable angle stops are super handy, especially the positive stops for 45°, 90°, and other common angles. Locking them in place feels secure, and the laser scale made angle adjustments quick and precise, even for more complex cuts.
The extendable fence up to 36 inches is a game-changer. It gave me plenty of room for larger workpieces, and the hidden flip stop meant I could easily repeat cuts.
Plus, the compatibility with different T-slot sizes means it fits most saws, which is a big plus.
Overall, this miter gauge offers solid accuracy, quick setup, and versatility—perfect for installing decks or making precise cuts in DIY projects. I felt confident every time I used it, and it definitely sharpens your woodworking game.
WEN Steel & Brass Miter Gauge with 27 Stops (WA1401)

- ✓ Heavy-duty construction
- ✓ Precise, positive stops
- ✓ Easy to read scale
- ✕ Slightly heavy to adjust
- ✕ Limited to 3/4-inch slots
| Material | Heavy-duty steel and brass |
| Number of Positive Stops | 27 |
| Compatibility | Industry-standard 3/4-inch by 3/8-inch miter slots |
| Miter Bar Compatibility | WEN models BA1411 Band Saw, TT0811 and TT1015 Table Saws |
| Features | Miter plate with laser-etched wear-resistant scale markings, brass lock knobs, and expansion discs to eliminate wobble |
| Warranty | Two-year limited warranty |
After finally getting this WEN Steel & Brass Miter Gauge into my workshop, I was eager to see if it could handle my deck-building projects with precision. The first thing I noticed is how solid it feels in your hand—heavy-duty steel and brass construction give it a reassuring heft.
It’s clear this tool is built to last, especially with the wear-resistant, laser-etched scale markings that are easy to read even after multiple uses.
Setting it up was straightforward thanks to the universal design that fits most industry-standard 3/4-inch by 3/8-inch miter slots. I particularly appreciated the miter bar expansion discs—they really help eliminate wobble, which is a huge plus when you’re making precise cuts for decking and framing.
The 27 positive stops came in handy when I needed consistent angles without fuss. The industrial-grade brass lock knobs feel sturdy and give you confidence that your setting won’t shift mid-cut.
I also found the two-year warranty reassuring, knowing WEN stands behind this product.
Using it on my table saw, I was able to dial in perfect miters for my deck boards. The smooth glide and positive locking made every cut feel precise and reliable.
It’s compatible not just with table saws but also with band saws and router tables, which adds to its versatility.
Overall, this miter gauge has become a staple in my woodworking setup. It combines durability, precision, and ease of use—exactly what you need when working on projects that demand tight angles and repeatability.
KETIPED 2-Pack Crosscut Sled for Table Saw & Miter Slot

- ✓ Smooth sliding action
- ✓ Durable UHMW material
- ✓ Easy to install
- ✕ Screws might be short
- ✕ Limited to 17-inch length
| Material | Ultra-high molecular weight polyethylene (UHMWPE) |
| Miter Slot Runners Dimensions | 17 inches (43 mm) long, 3/4 inch (19 mm) wide, 3/8 inch (9.8 mm) thick |
| Pre-drilled Holes | 5 precisely sized, countersunk holes per rod |
| Coefficient of Friction | Low, suitable for smooth sliding |
| Compatibility | Fits most woodworking workpieces, suitable for table saws, radial arm saws, benchtops, and drill presses |
| Package Contents | Two 3/4 inch x 3/8 inch x 17 inch crosscut miter bars with self-tapping screws |
Many people assume that crosscut sleds are just simple accessories that don’t make much difference in precision. But after using this KETIPED 2-Pack Crosscut Sled, I can tell you that’s a misconception.
The moment I installed one of these on my table saw, I noticed how smoothly and accurately I could make crosscuts.
The build quality is impressive—made from ultra-high molecular weight polyethylene, it feels sturdy yet lightweight. The material doesn’t swell, warp, or absorb moisture, which means it stays reliable over time.
The 17-inch miter bars fit snugly into my saw’s slot without any wobble, thanks to the precisely drilled holes and countersinks.
What really stands out is how effortless it is to slide the sled back and forth. The low coefficient of friction makes repeated cuts smooth and consistent, saving me effort and frustration.
Plus, setting up different angles is straightforward with the sturdy runners and simple design.
The versatility is another bonus. I’ve used it not just for crosscuts but also to build custom fixtures.
It’s compatible with my radial arm saw and drill press, making it a versatile addition to my workshop. The package comes with two bars and screws, so I have a backup ready, which is handy.
If you’re tired of unstable or poorly fitting sleds, this set will change how you see crosscutting. It’s well-made, easy to use, and a real time-saver for precise cuts.
The only minor hiccup is that the screws could be a little longer for thicker workpieces. Still, overall, a solid upgrade for woodworking safety and accuracy.
What Factors Should You Consider When Choosing Between a Miter Saw and a Table Saw for Deck Installation?
When choosing between a miter saw and a table saw for deck installation, several key factors should be considered:
- Type of Cuts Needed: A miter saw excels at making angled cuts, which are ideal for trimming and creating mitered edges at corners, while a table saw is better for making long, straight cuts.
- Portability: Miter saws are generally more portable and easier to transport, making them suitable for outdoor deck installations, whereas table saws are larger and can be cumbersome to move around.
- Precision and Accuracy: Miter saws typically provide greater precision for crosscuts and bevel cuts, allowing for cleaner edges, while table saws offer more versatility for rip cuts and can handle larger pieces of lumber.
- Material Thickness: If you’re working with thicker materials, a table saw may be more efficient, as it can handle larger stock, whereas miter saws are limited by their maximum cutting depth.
- Cost Considerations: Miter saws tend to be less expensive than table saws, making them a more budget-friendly option for those who may not need the capabilities of a table saw.
- Safety Features: Both saw types have safety features, but table saws require more caution due to their exposed blade and higher risk of kickback, which is a consideration for novice users.
How Does a Miter Saw Benefit Your Deck Installation Project?
Its portability is a significant advantage on larger job sites where moving equipment frequently is necessary; a miter saw can be easily set up in different areas as work progresses.
The user-friendly design of miter saws encourages quick adjustments, which is particularly beneficial when dealing with multiple cuts during the deck installation process.
By enabling precise cuts, a miter saw can drastically reduce the amount of wasted materials, making your project more cost-effective and environmentally friendly.
Finally, the versatility of a miter saw means it can be used not just for deck boards but for various other cuts, allowing for creative designs and efficient use on multiple aspects of the deck construction.
What Are the Key Advantages of a Table Saw for Deck Installation?
The key advantages of using a table saw for deck installation include precision, efficiency, and versatility.
- Precision Cutting: Table saws are known for their ability to make straight, accurate cuts consistently. This precision is crucial when dealing with materials for decking, ensuring that each piece fits perfectly, which reduces waste and enhances the overall look of the deck.
- Efficiency: With a table saw, you can quickly make multiple cuts without having to reposition the material each time. This efficiency is especially beneficial when cutting numerous deck boards to the same length, allowing for faster project completion.
- Versatility: Table saws can handle a variety of cuts, including rip cuts, crosscuts, and angled cuts. This versatility means you can use the same tool for different aspects of your deck installation, such as cutting boards to size or creating custom angles for railings and joists.
- Safety Features: Many table saws come equipped with safety features such as blade guards and riving knives. These features help minimize the risk of accidents while working, which is particularly important when handling large and heavy materials typically used in deck installations.
- Adjustable Height and Angle: A table saw allows you to adjust the height and angle of the blade, making it easier to achieve various cuts for complex projects. This flexibility is beneficial when installing decks that may require notched or beveled cuts for a more polished appearance.
In What Scenarios is a Miter Saw Preferable Over a Table Saw for Deck Work?
In certain scenarios, a miter saw is preferable over a table saw for deck work due to its specific advantages. Here are key situations when opting for a miter saw is beneficial:
-
Angled Cuts: Miter saws excel at making precise angled cuts, such as those required for installing trim or corner boards on decks. The ability to easily set the desired angle ensures clean joints and seamless connections.
-
Cross-Cutting Lumber: When dealing with decking boards or support beams, a miter saw quickly and effectively cross-cuts wood to size. This speed is particularly advantageous when working with long materials.
-
Portability: Miter saws are generally lighter and easier to transport than table saws, making them ideal for job sites where mobility is important. This portability allows quick setups in various deck locations.
-
User-Friendly Operation: A miter saw’s design allows for straightforward operation, especially for those not as experienced in woodworking. The guided cutting motion enhances accuracy and can minimize the risk of mistakes.
-
Space Efficiency: In tight working conditions or smaller workshops, miter saws require less space than table saws, facilitating better maneuverability around the deck area.
These attributes make miter saws a strong choice for many decking projects, optimizing both efficiency and accuracy.
What Limitations Should You Be Aware of When Using a Miter Saw or Table Saw for Deck Installation?
When considering the use of a miter saw or table saw for deck installation, it’s important to be aware of their limitations.
- Cutting Capacity: Miter saws typically have limited cutting capacity compared to table saws, which can affect the size of deck boards you can cut.
- Accuracy: While both saws can produce accurate cuts, miter saws may struggle with long boards, leading to potential inaccuracies when cutting larger pieces required for decking.
- Portability: Miter saws are generally more portable than table saws, but their limited work surface can be a disadvantage on larger deck projects that require stability.
- Rip Cuts: Miter saws are not designed for rip cuts, which are often necessary for cutting deck boards to width, making table saws more versatile for such tasks.
- Setup Time: Table saws usually require more setup time, including adjustments for blade height and fence alignment, which can slow down the workflow during deck installation.
- Safety Features: While both saws have safety features, table saws can pose a higher risk for kickback, especially with larger and thicker materials.
The cutting capacity of a miter saw is typically limited to certain widths and depths, meaning that if you are working with wider deck boards, a table saw may be more suitable for those cuts. Miter saws excel in making crosscuts and angled cuts but may not handle longer boards as easily, which could lead to less precise cuts for deck framing.
Accuracy is crucial when installing a deck, and while both saws can achieve precise cuts, the miter saw may be less effective for longer pieces, requiring careful handling and measurement to ensure straight cuts. In contrast, a table saw’s larger surface area provides better support for long boards, helping maintain accuracy throughout the cutting process.
Portability is a strong point for miter saws, making them easier to transport to different job sites, but their smaller work surface can be less stable when working on larger deck installations. Table saws, while heavier and less portable, offer a stable platform that can handle larger materials with ease.
Miter saws are not designed for rip cuts, which are essential for resizing deck boards to fit specific widths; this limitation means that you will need a table saw for those tasks. The versatility of table saws allows for both rip cuts and crosscuts, making them a more comprehensive option for deck installations.
Setup time can be a factor when choosing between these saws, as table saws often require more adjustments before use, which can slow down the installation process. Miter saws can be ready to go more quickly, allowing for faster cutting of angles and crosscuts, but this convenience may come at the cost of versatility.
Lastly, while both saws come with safety features, the risk of kickback is more prevalent with table saws, especially when dealing with thicker or larger materials. It’s essential to use proper techniques and safety precautions with either saw to prevent accidents during deck installation.
How Do You Maintain Safety When Using a Miter Saw or Table Saw for Deck Projects?
When using a miter saw or table saw for deck projects, maintaining safety is paramount to prevent accidents and injuries.
- Personal Protective Equipment (PPE): Wearing appropriate PPE is crucial for safety while operating saws.
- Proper Setup and Stability: Ensure the saw is set up on a stable surface to avoid any movement during operation.
- Blade Maintenance: Regularly check and maintain the blades to ensure sharpness and proper function.
- Clear Work Area: Keep the work area clean and free from clutter to prevent tripping hazards.
- Understanding the Tool: Familiarize yourself with the specific features and functions of the saw being used.
- Use of Safety Features: Make sure to utilize all safety features provided by the saw, such as blade guards and emergency shut-offs.
- Two-Person Operation for Large Pieces: When cutting large pieces of lumber, having a second person can help stabilize the material.
- Correct Cutting Techniques: Practice correct techniques such as pushing the wood through the blade steadily and avoiding free-hand cutting.
Personal Protective Equipment (PPE): Wearing safety glasses, hearing protection, and dust masks is essential to protect against debris and noise. Gloves can protect your hands, but ensure they don’t get caught in the blade.
Proper Setup and Stability: Set your saw on a flat, stable surface to prevent movement or tipping while cutting. This setup helps ensure accurate cuts and reduces the risk of accidents caused by the saw shifting unexpectedly.
Blade Maintenance: A dull blade can lead to kickback and uneven cuts. Regularly inspect blades for wear and tear, and replace them when necessary to maintain optimal cutting performance.
Clear Work Area: A tidy workspace helps reduce distractions and the risk of tripping over tools or materials. Make sure that excess materials and tools are stored away from the immediate cutting area.
Understanding the Tool: Each saw has unique features, such as bevel adjustments and fence settings, which can affect the cutting process. Take time to read the user manual and understand how to operate the saw safely.
Use of Safety Features: Many saws come equipped with safety guards and features that prevent accidental activation. Always ensure these features are in place and functional before operating the saw.
Two-Person Operation for Large Pieces: Large pieces of lumber can be unwieldy and may tip or move unexpectedly. Having a partner help support the wood can lead to safer, straighter cuts and minimize the risk of injury.
Correct Cutting Techniques: Always push the wood through the blade firmly and steadily, avoiding sudden movements that can cause kickback. Avoid the temptation to cut free-hand; instead, use guides and fences to maintain control and accuracy.
Related Post: